An Introduction to Photo Editing with PhotoLine: Setup
Download and install
If you have not already, download PhotoLine from
https://www.pl32.com/pages/down.php.
It would not hurt to read the manual, which you may download as well.
Installation should be straightforward. PhotoLine installs and works perfectly (except for scripting) in Linux using Wine.
The installation folder in Windows should be something like C:\Program Files\PhotoLine. In Wine it is
/home/username/.wine/drive_c/Program Files/PhotoLine.
To access the corresponding folder on a Macintosh, right-click PhotoLine.app and select Show Package Contents; the folder is Contents/Resources.
⊞ Notes on Linux installation
After installing Wine, run
winecfg
to make sure it is working; you can also set the windows version as it seems to matter with some programs.
Then install PhotoLine by running the following (using the path and name of the installer):
wine "/home/username/Desktop/pl2200.exe"
To create a menu or desktop launcher, use the following command and icon:
wine "/home/username/.wine/drive_c/Program Files/PhotoLine/PhotoLine.exe"

PhotoLine is always under active development; you may follow along and try beta versions on the
Betatester unter sich
(beta testers among themselves) forum;
Google Translate.
If you create a folder called PhotoLineSettings in the installation folder, all of your settings, including layout, user interface options, actions, context menu, and toolbars will be saved to this folder, and can be copied to another installation. It is best to do this immediately after installation; otherwise all the settings will have to be reset from scratch. In Windows, I had to change the security settings for the PhotoLineSettings folder via Properties – Security – Edit – Users, allow Modify and Write.
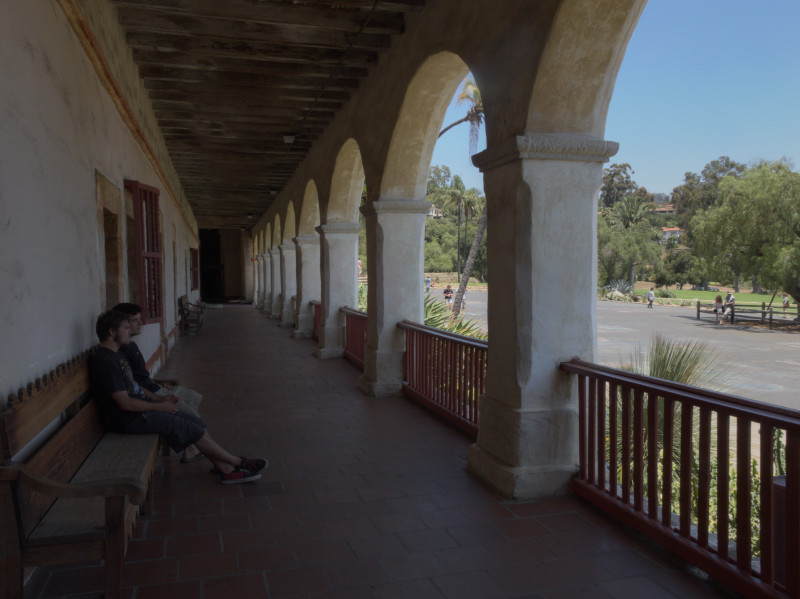
This
is the image that will be used in the examples; feel free to download it and follow along. (It also overlies the screenshot below.)
Layout
PhotoLine’s default layout leaves something to be desired. I recommend a more useful one such as the one I use,
myPanelLayout.xml
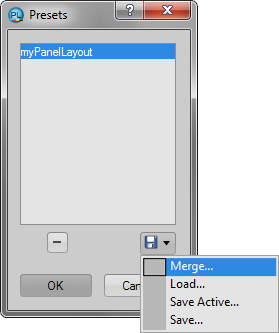
(right-click and download or save the file). Install it by clicking View – Panel Layout – Edit Panel Layouts.
Click the file dropdown and choose Merge; this will allow you to import and add layouts such as the one above to an existing list. (Load imports a layout and replaces the existing list; Save Active exports the active layout to a file; and Save exports the whole list to a file.) After importing it, apply the layout via View – Panel Layout – myPanelLayout. If you make changes to a layout, you may save it via View – Panel Layout – Save Panel Layout and it will be added to the list. You may switch back and forth between layouts for different purposes.
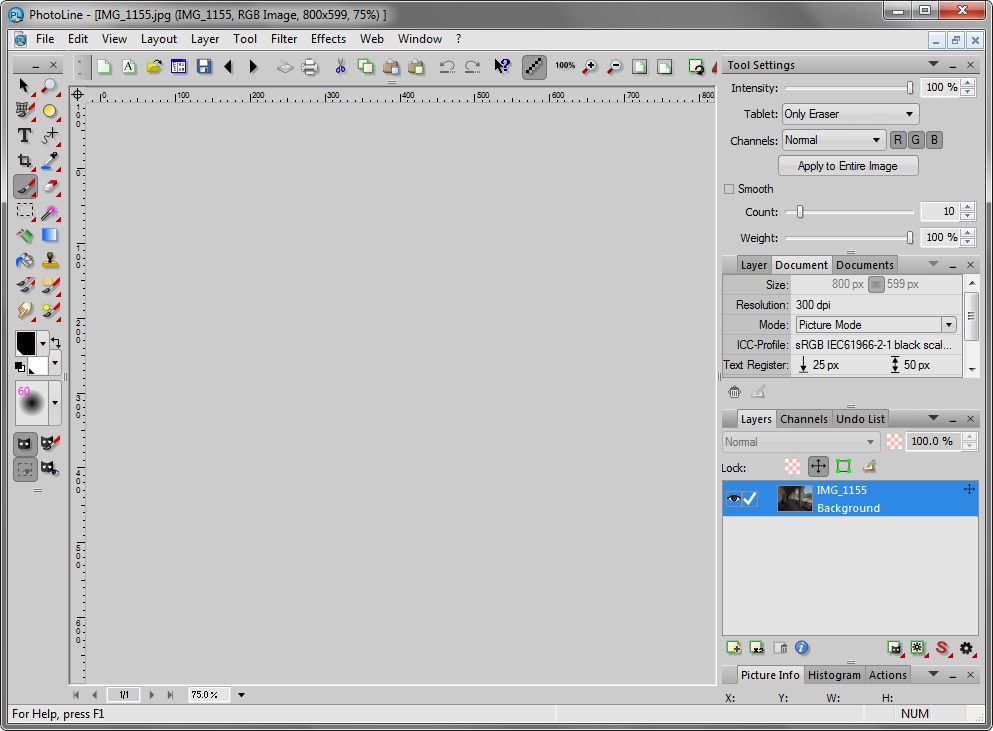
In the screenshot above, the Painting tool is selected in the toolbox on the left. On the right are panels that both provide information about the image, and allow you to make changes. For example, you can see that the Painting tool’s intensity is 100%, the document’s size is 800px by 599px, and it only has one layer, the background. The panels can be undocked and moved around as needed; reset them by applying your panel layout as above. More panels are available via View – Panels.
Set the display colors and other options via Edit – Options – Display – User Interface (on a Macintosh the menu is PhotoLine – Preferences).
ICC color profiles
Color profiles are an important aspect of photo editing. If you are new to the concept, a detailed discussion is beyond our scope. Much information is available online, starting with
Wikipedia.
For detailed information, consult a book such as
Real World Color Management
by Bruce Fraser. A crash course: color profiles are how your computer, your display, someone else’s display, your printer, and any other color-managed device all know how to display the same colors. One of the main differences between color profiles is the gamut, or the range of colors that may be accurately displayed. The gamut depends on the image’s source and destination. Three color profiles that you should be familiar with, in order of increasing gamut size, are sRGB, Adobe RGB, and ProPhoto RGB. A rough guide:
• If the image comes from a small, low-end camera, or is intended for the internet, use sRGB (there are a number of versions) or an equivalent (such as c2, Facebook’s simplified version).
• If the image is from a better camera and is intended for printing, use Adobe RGB.
• If you converted the image from raw, are using 16-bit, and feel comfortable with the entire process, use ProPhoto RGB.
Your computer may already have these profiles installed. If not, here is where you may download them:
• sRGB2014.icc –
The International Color Consortium
• AdobeRGB1998.icc –
Adobe
• ProPhotoRGB.icm – apparently no longer available from its developer, Kodak; you can download it
here.
Additionally, your display, and printer as the case may be, should have their own color profiles. You can probably download them from the manufacturers if not already installed. Note that printer profiles are specific to the paper, and printer settings such as quality. If you really get into it, you may want to create your own profiles, such as with a device from
X-Rite.
To install profiles in Windows, right-click the .icc or .icm file (the extension is arbitrary) and choose Install Profile. If you are curious, the folder where profiles are stored is C:\Windows\system32\spool\drivers\color.
To install profiles on a Macintosh, copy the files to Users/username/Library/ColorSync/Profiles.
In Linux, copy the files to /home/username/.local/share/icc or /home/username/.color/icc depending on your system.
PhotoLine has its own folder where profiles that are not installed for some reason may be copied; you will probably not need to use it: PhotoLine/Defaults/ICCProfiles.
Color Management
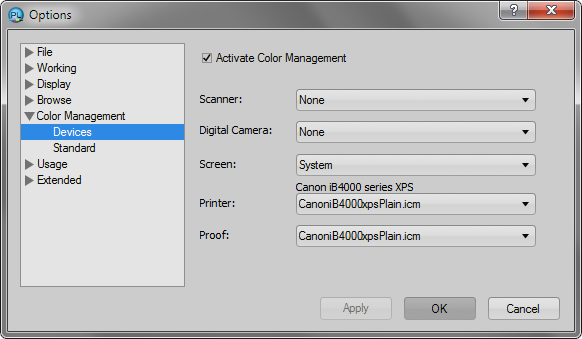
Set up color management via Edit – Options – Color Management (on a Macintosh the menu is PhotoLine – Preferences). First select Devices:
If you have a display profile installed and applied, setting the screen profile to System should be all you need to do. Set your default printer profile if applicable.
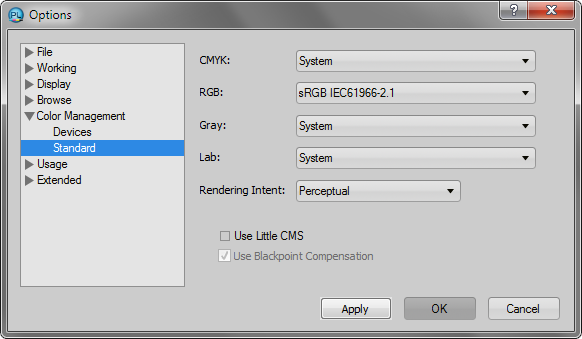
Now go to Standard:
The default profiles specify how untagged images should be displayed; they do not actually assign a profile to the image. sRGB may be as good a choice as any as it is probably correct for a large number of untagged RGB images. Rendering Intent determines how out-of-gamut colors are handled when assigning or changing color profiles; for importing new images, Perceptual may be the best choice. Relative Colorimetric is the other typical choice, especially if you are printing portraits.
If you are using Windows or a Macintosh, your operating system has its own color management system. If you are using Linux, this may not be the case. PhotoLine now incorporates Little CMS, which is selected by default in Linux and takes the place of an operating system CMS. You will also want to select Use Blackpoint Compensation.
Plugins
PhotoLine is able to use .8bf plugins that are compatible with other major photo editors. If you have plugins already installed for other applications, PhotoLine is able to load them if you specify their location via Edit – Options – Extended – Plug-In Modules. An example would be C:\Program Files\Adobe\Adobe Photoshop CS5 (64 Bit)\Plug-ins. If you have no existing plugins folder, PhotoLine has its own: PhotoLine/Defaults/Plugins; simply copy the .8bf files (and associated .dll files if needed) to this folder.
Next: basic concepts
As an Amazon Associate, I earn from qualifying purchases.