An Introduction to Photo Editing with PhotoLine: Tips and Tricks
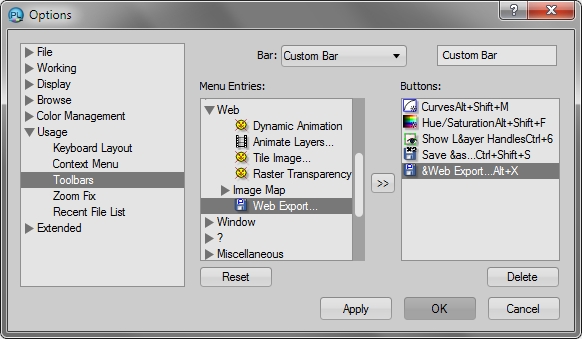
The toolbars are customizable. The default toolbar is General; you can edit it or create a new one (View – Toolbars – Custom Bar). Right-click a toolbar (any of the icons) and select Edit Toolbar. (Or Edit – Options – Usage – Toolbars.) Select any menu entry, then click the double arrowhead button and a new button will be added below the selected one. Adjustment layers, Save as, and Web Export are good ones. You can also delete any of the default buttons.
|
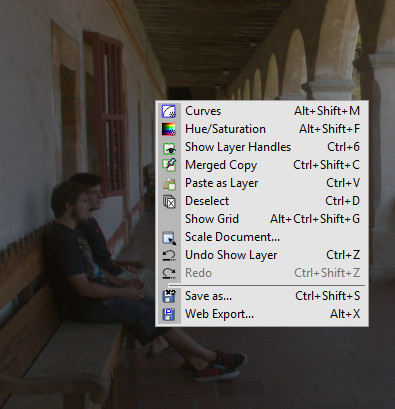
The displayed image has a context menu which may be customized by the user via Edit – Options – Usage – Context Menu. Click the double arrowhead button to add items as above. To use the custom context menu, middle click on the image, or Shift + right click.
 |
If you created a folder called PhotoLineSettings in the installation folder, all of your settings, including the toolbars and context menu, are saved to a file called PhotoLine.xml, allowing you to share your settings between installations.
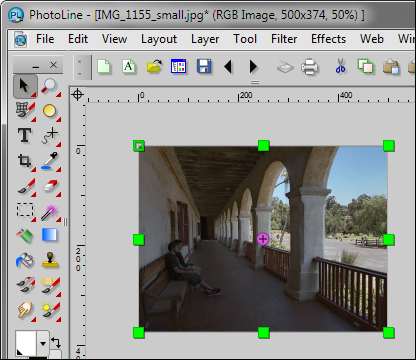
When you paste a layer, layer handles are displayed by default. To hide them for the current document, click View – Show Layer Handles. (You can add it as a button to the toolbar, or to the context menu.) Unfortunately there is no way to change the default behavior.
 |
In addition to the Lens Correction filter, the Crop tool, Rectify, and Outline Warping may be used to correct perspective distortion. Crop the entire image, or an area slightly larger. Then click and drag one of the corner or side points while holding down the Ctrl key (Cmd key). Clicking anywhere else rotates the image. Rectify (Filter – Digital Camera – Rectify) is a quick but perhaps less precise way to correct perspective distortion; place the four points so they define what should be horizontal and vertical lines. Find Outline Warping at Effects – Distort – Outline Warping, and select the rectangle shape.
To view an image with fewer distractions, click View – Hide Panels/Show Panels. (The default keyboard shortcut is F11, which is customizable via Edit – Options – Usage – Keyboard Layout.)
When making very small adjustments, such as colorizing with a Hue/Saturation layer, or color balancing with curves, it sometimes helps to reduce the opacity of the layer to allow finer control over the adjustments.
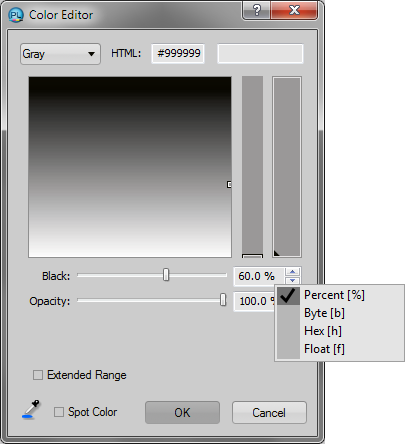
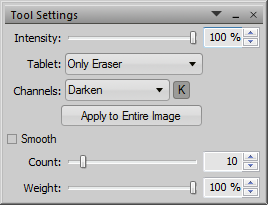
When painting on a mask, partial opacity may be obtained by painting with white or black and reduced intensity. But repeated brush strokes will be additive. To paint with a solid gray color, double-click the foreground color field and select one. (If you right-click the number fields you can change them from Byte to Percent.) If you want to paint over white and leave black areas untouched, change the brush blend mode (“Channels”) to Darken. Change it to Lighten to paint over black and leave white untouched. (Remember to change the mode back to Normal when you are through!) Below is a mask with two gray brushstrokes, one set to Lighten and the other to Darken.
 |
 |
|
 |
||
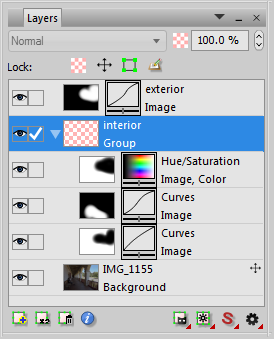
Large numbers of layers may be grouped for easier management. Select the layers to be grouped by checking the boxes beside the eye icons, by clicking each layer while holding down the Ctrl key (Command key), or by clicking the first and last layer to be selected while holding down the Shift key. Then right-click the layers and select Group Marked Layers, or use Layer – Management – Group Marked Layers. Name the group by double-clicking the Name label. Expand the group by clicking the little arrowhead to the left of the thumbnail. The individual layers may still be edited. In addition, the entire group may be turned off and on with the group’s eye icon, or moved up or down in the layer list by clicking and dragging it. If you change your mind, the Ungroup command is below Group Marked Layers.
 |
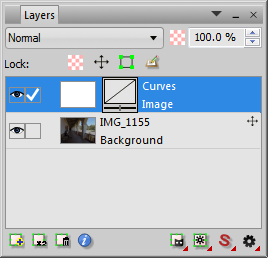
The spin buttons for layer opacity default to increments of 10. If you hold down the Shift key, the increment becomes 1. Shift and Ctrl may be used to change the increments of other spin buttons and sliders as well.
 |
The color mode that PhotoLine calls HIS is actually a modified version of HSL, which has been “improved” in a sense by replacing saturation with chroma (max(R, G, B) - min(R, G, B)). You can see this by comparing HIS and RGB values in the Picture Info panel; I is HSL lightness ((max(R, G, B) + min(R, G, B)) / 2), and S is chroma. It applies to curve adjustments, color filters, and the Change Channels tool as well. Maybe think of it as HLC . . . .
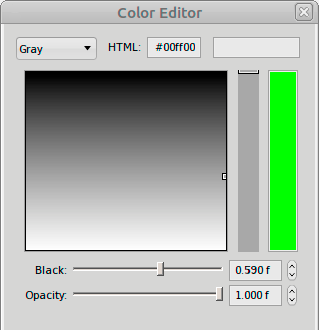
Grayscale conversions use a transformation similar to Luma: 0.300*R + 0.590*G + 0.110*B. To see each color’s coefficient, open the Color Editor by double-clicking one of the color fields, set the mode to RGB, right-click one of the number fields, and set the units to Float. Then set each color in turn to 1.000 and change the mode to Gray.
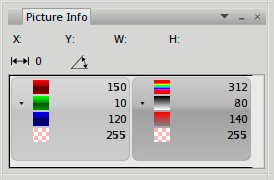 (150 + 10) / 2 = 80 150 - 10 = 140 |
 |
Keyboard shortcuts:
|
|
More resources:
A PhotoLine Video Series
Videos by Bob Shrader
Introducing PhotoLine by SCX
PhotoLine Quick Reference by Evren Comert
Videos in several languages
More videos
The PhotoLine Forums
The PhotoLine Facebook page
