 |
 |
The Fine USM Sharpen/Deblur .8bf Plugin
Version 1.201
 |
 |
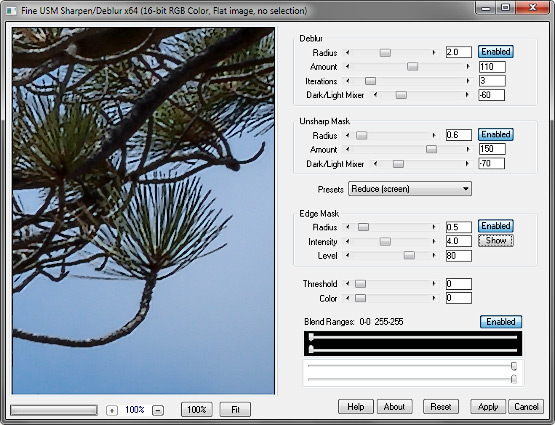
Fine USM Sharpen/Deblur gives you full control over the unsharp masking and deconvolution processes, including halo elimination, luminosity mode, very high amounts, edge masking, and blend ranges.
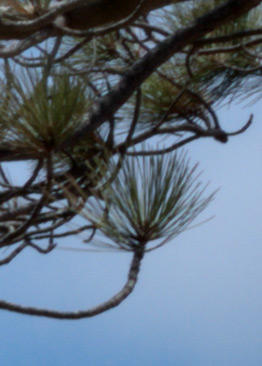
(The screenshot above was resized, but the preview inside it was copied and pasted from the actual sharpened image. It is a detail from an unsharpened raw original, 7370 × 4916. Pine needles, in case you have never tried it, are very hard to sharpen without creating halos or other artifacts.)
• Deblur is a simple disk deconvolution sharpening. Its effect is subtler than USM and it tends to be of more value early in the workflow. It may be preferable to USM if all that is needed is a small amount of capture sharpening, or to “finish off” the image after a large amount of USM after resizing.
• The Radius setting is not quite as constrained as it is in USM; start with 2 pixels or so.
• Increasing the number of iterations is not routinely needed for general image sharpening. When increasing the number of iterations, reduce the amount proportionately. A high number of iterations tends to have a smoothing effect.
• Note that deblurring takes longer than unsharp masking, especially at high radii and multiple iterations.
• Unsharp mask sharpening tends to be of greater value later in the workflow, especially before printing.
• For USM, the Radius setting is generally small, and dependent on the resolution of the output medium. Typical values are 0.6 pixels for a 96 ppi screen, and 2 pixels for a 300 ppi print. Larger radii may be used for detail enhancement.
• The Amount setting for sharpening is generally large, sometimes several hundred percent. Values are chosen based on factors such as the sharpness of the original and the type of detail being sharpened.
• One way to approach finding the right parameters is to raise the amount to an extreme level, then increase the radius until the halos start to visibly separate from the edges that they surround; then reduce the amount to an appropriate level.
• Dark/Light Mixer works as follows: the central position (zero) displays the processed image; the far left is like Darken blend mode, and the far right is like Lighten. This is used to adjust the balance of light and dark halos in the processed image. As light halos are generally more objectionable, a good default setting is about -70 for USM, possibly less for deblurring.
• The edge mask may be used to sharpen edges and high-contrast areas only. Blur it with Radius, and adjust it with the Intensity and Level sliders. Its appearance is dependent on the size and content of the preview; it is best to view it, as well as the sharpened image, at 100%. The processed image will use the same mask as the preview.
• Threshold determines the minimum lightness difference at which sharpening will be applied. It may be used to prevent the sharpening of noise or smooth surfaces. (Edge masking may be more effective.)
• Color controls how much of the processed color components are included in the final image. This is generally kept at zero (Luminosity blend mode) to prevent color fringes and the enhancement of color noise. It also lets the plugin run faster.
• Raise the lower black slider in Blend Ranges to gradually fade the sharpening effect in the shadows; lower the upper white slider to similarly fade the highlights.
Presets include JPG Capture (screen), RAW Capture (screen), Reduce (screen), Enlarge (screen), Print 300 ppi, and Print 600 ppi. These settings are of course points of departure. When printing, for example, if your workflow starts with capture sharpening then processing the full-sized image, you must take into account whether the image is resized before printing; if so, it will need more sharpening. Another option may be to sharpen the image for the screen after resizing, then to sharpen it again for printing; this may or may not be useful.
Now that you have full control over the sharpening process, consider bilinear interpolation for halo-free image reduction. For enlarging, bicubic smoother and Mitchell-Netravali preserve detail better, and halos are less of an issue in general.
What about high-pass sharpening? At this scale, high-pass and USM sharpening are virtually identical. The differences are subtle, mostly the result of the choice of blend modes used to generate the high-pass image, and can be overcome by adjusting the sharpening amount. Unsharp masking is as good or better than any of the high-pass modes, and sometimes seems to preserve a little more shadow detail.
The plugin works with 8- or 16-bit RGB and grayscale images.
Improvements to version 1.2:
• improved interaction between the two sharpening methods
• improved edge mask
• an improved progress bar
Improvements to version 1.201:
• reduced memory requirements; should run better on larger images, 10,000 pixels or more.
Download
Download the zipped file, then copy the plugin, the help file, and the demo registration key into your plugins folder. The filter will appear under “RC Filters.”
Download them all
Registration
The unregistered filters will save images up to 720 pixels in width and/or height. Please purchase a registration key for $9.00 which unlocks all of the RC Filters. Use either of the secure links below and I will e-mail you a text file (RCFKey.txt) to copy into your plugins folder. Be sure to use a valid e-mail address (I don’t sell or give them away). I check my e-mail for payment notifications every morning, Pacific time, and other random times; if you do not receive a key within one day it means I am in the hospital. If you paid for any of the RC Filters before keys were used, email me and I will send you a key. The filters come with a demo key; if properly installed, the dialog will say “Demo key” when you click the About button. Questions . . . .
The filters, the help files, and the registration key all go into the same folder. It may help to make an RC Filters subfolder. Each filter has a link back to the plugin folder on the About dialog for easy access.
|
© 2018 by Russell Cottrell; released under the
GNU General Public License. Updated Updated 6/5/2018. |
11613 |