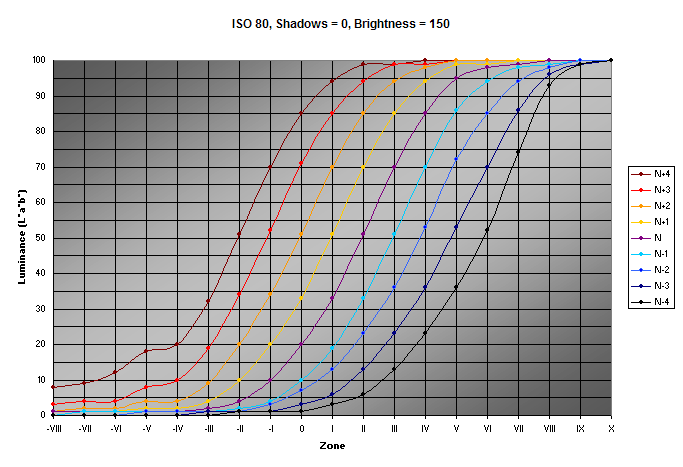
Beyond the Digital Zone System—Results
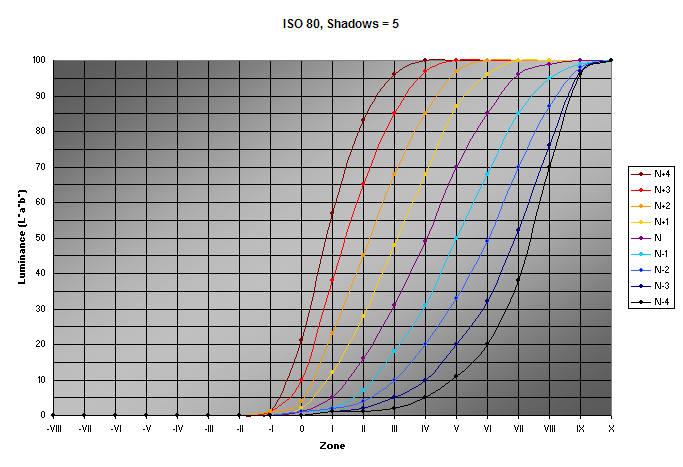
Here are the exposure-response curves at ISO 80, Shadows = 5 (the default value), and Exposure settings ranging from -4 to +4. Similarly-processed thumbnails of one of the example images on the next page appear below the curves to illustrate what these adjustments do in real life.
If you are familiar with the characteristic curves of film, you will recognize this pattern. The effect of varying Exposure is so much like varying film development that I cannot resist referring to the settings as N, N+1, N+2, etc.
 |
 |
 |
 |
 |
 |
 |
 |
 |
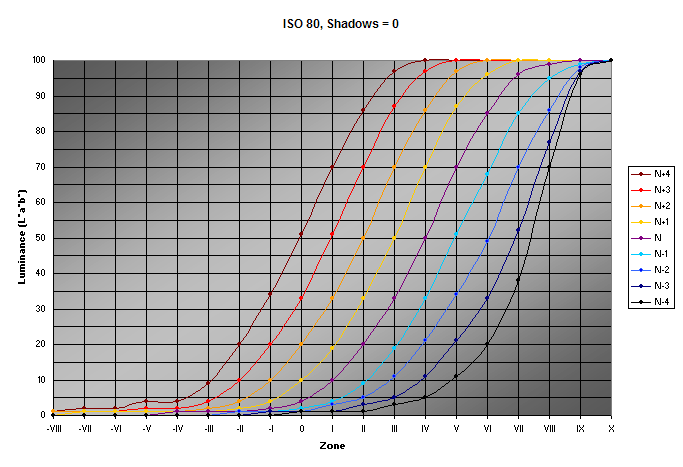
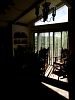
Note that, like transparencies, and unlike negatives, the highlights have an absolute maximum value, above which they “blow.” The shadow values, however, taper off slowly, and increasing the Exposure setting extends the tonal range of the shadows downward. This is evident when Shadows is lowered to 0:
 |
 |
 |
 |
 |
 |
 |
 |
 |
The shadow values are extended up to 3 stops, at the expense of contrast. And, as we shall see later, horizontal shadow curves represent digital noise. Zone IX is near the limit for the highlights.
Just out of curiosity, raising the Brightness (midpoint) slider from the default +50 to +150 raises the midtones and further opens up the shadows, with a lesser effect on the highlights. It is almost identical to increasing Exposure by two, while preserving a little more highlight detail. Extreme Brightness + Exposure adjustments may extract a small amount of detail in extreme situations, but are not likely to contribute much to the useful tonal scale of conventional images.
 |
 |
 |
 |
 |
 |
 |
 |
 |
Raising the Shadows slider merely blocks the shadows and compresses the tonal range. Note the asymmetry between the following and the first two graphs: raising the highlights drags more detail out of the shadows, but lowering the shadows does not drag more detail out of the highlights.
|
 |
 |
 |
 |
And if you just can’t stand it, this is what moving the Contrast slider does. Little useful detail is gained at the extremes.
 |
 |
 |
 |
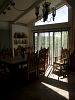
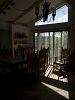
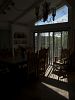
Examining what these images actually look like, we can draw some conclusions.
 |
 |
 |
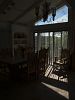
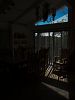
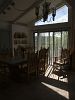
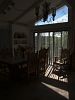
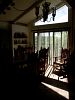
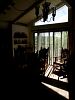
The three images above all have luminance values near 5.
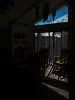
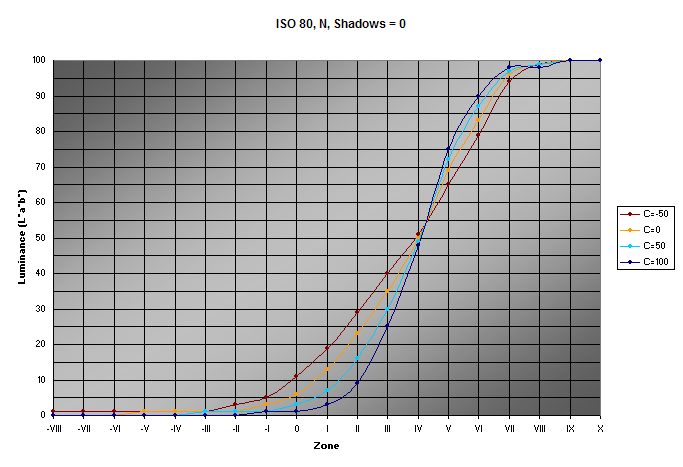
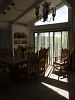
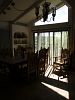
1. As-is out of the camera: N Exposure, Shadows = 5, zone I
2. N+2 Exposure, Shadows = 0, zone -II; a reasonable gain of almost 3 stops
3. N+4 Exposure, Shadows = 0, zone -IV; 2 more stops, but lots of noise; these shadows are not really usable
 |
 |
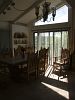
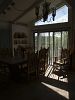
These two images have luminance values near 95.
1. N Exposure, zone VII
2. N-4 Exposure, zone IX
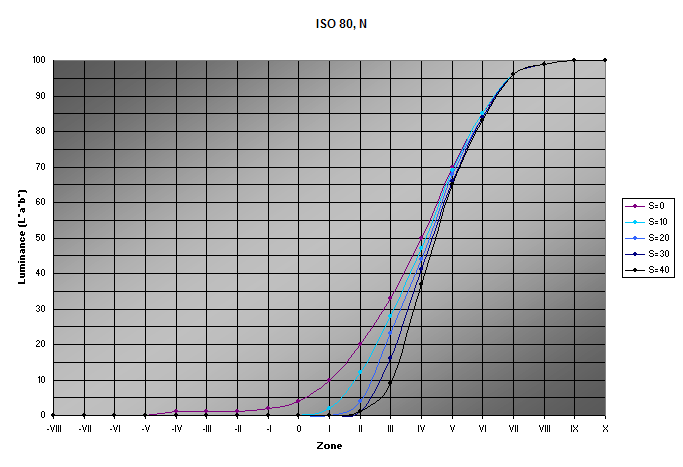
Here is a display of all of the zone values, with extensions in each direction accomplished by adjusting the Exposure and Shadows settings of the RAW image:
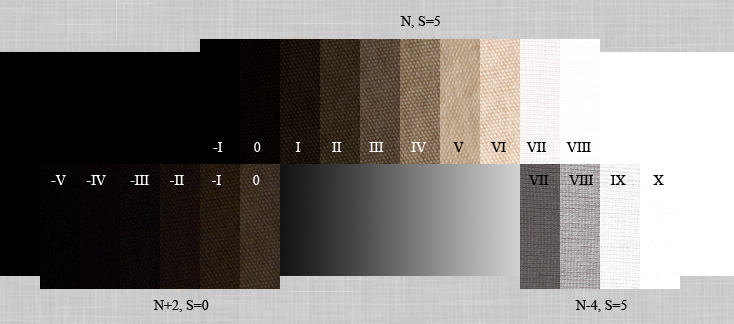
Real texture only extends downward to zone -III; below that, noise takes over. The N+2, S=0 luminance values never reach 0 because of the persistence of noise all the way down; some post-processing would be needed to fix the shadows. The shadows at N+3 or N+4 and S=0 are too noisy to be of much use. No such limitation exists at the upper end of the range; but the highlight values all hit the top abruptly.
In terms of luminance values, texture extends down to 1 or 2, depending on the amount of noise, and upward to 98.
I conclude that for images processed using the default settings, the textual range is 0 to VII, and the dynamic range is probably about -1/2 to VII 1/2. The textural range can be extended downward to -III by processing the RAW image at N+2, S=0, and upward to IX or a little more by processing at N-4. Because the upper end is the more limited end of the range (and other reasons that have to do with the nature of digital image capture), the exposure rule becomes, “Expose for the highlights and process for the shadows.”
So how do we make use of this information? This is illustrated using the examples on the next page.
| Next: examples |  |