Beyond the Digital Zone System
So what is the zone system?
In brief:
The definition of photography that I proposed back in the rec.photo.darkroom days was, “photosensitive image capture.” Conventional photography consists of the creation of an image by capturing the light reflected (or sometimes emitted) from the subject. The subject in this sense is whatever is being photographed, whether it be a person or a scene in general. The image may take various forms during the photographic process; it usually begins as an invisible latent image in the photosensitive medium, either film or the sensor in a digital camera; and may be transformed into a negative, a positive transparency, a digital image file viewable on a computer screen, or a print on paper.
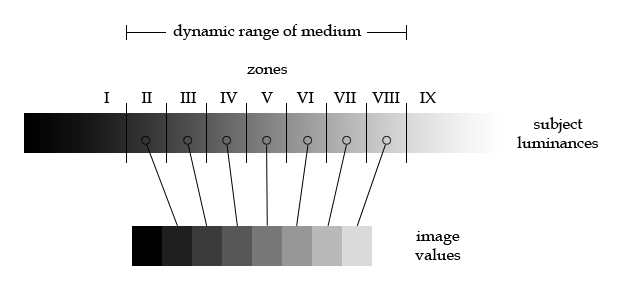
We refer to the amount of light reflected from the various subject elements as luminance. When a photographer looks at a scene, he or she sees a range of subject luminances which he or she intends to convert into image values. The eye responds to luminance logarithmically, and it is common to express luminance differences in units of powers of two, which I shall call stops. The range of luminances in any given environment may be huge, sometimes 20 stops or more. But no photographic medium can record such a large range in a single image; there is a limit to each medium’s dynamic range. Negative films, both color and black-and-white, can usually record a range of at least 12 stops. Transparency film can record much less. Digital media were formerly limited to small ranges as well, but are catching up to film due to ongoing improvements in technology. (The range of useful digital image values is often less than that advertised because of the presence of shadow noise.)
Image values usually range from black to white. “Black” may consist of the darkest area in a print which contains the maximum amount of ink or precipitated silver, or it may refer to totally dark pixels on a screen. “White” may be plain paper without any ink or silver content, or screen areas illuminated by pixels of maximum intensity. In between black and white is a continuous spectrum of values including all possible values of gray, and all of the colors that the image medium is capable of reproducing (its gamut).
Most image media cannot literally reproduce all of the luminances captured by the photosensitive medium. A 12-stop range of subject luminances represents a 1:4096 contrast ratio from black to white. A high-quality photographic print has something like a 1:100 contrast ratio; good LCD monitors have more like 1:1000. (High-dynamic-range monitors are now becoming available which offer more of a real-world viewing experience.)
So, what the photographer is seeking to do is to record a subset of subject luminances in the photosensitive medium, which will be reproduced as a smaller range of values in the final image.
We measure subject luminances with a light meter. Conventional light meters are based on the aperture and shutter speed combinations which determine the exposure of the medium to light. These combinations are properly referred to as exposure values; and each increment, or stop, results in a doubling or halving of the amount of light captured by the exposure.
The sensitivity of the medium to light is called its speed. Film and digital camera manufacturers publish a speed for each medium based on standards set by the International Organization for Standardization (ISO). Light meters couple the designated speed with the amount of light that they receive from the subject to indicate an exposure value.
The photographer presumably knows what he or she is looking at, and has an idea of what subject elements should appear light or dark in the final image. The light meter, however, has no such idea. If the film or camera speed has been correctly determined, then metering a uniform subject and using the indicated exposure value to take the picture will result in an image value about halfway between black and white; the usual term for this is “middle gray,” but of course it may be a color. This applies to any subject, be it a coal bin or a snowdrift. Cameras generally have some sort of averaging meter built-in; it averages the entire scene and indicates an exposure that assumes that the overall luminance of the scene is a middle gray. However, this assumption is often not the case; and even when it is close, some bright or dark subject elements may fall outside the dynamic range of the medium, and so be overexposed or underexposed in the image.
Can the photographer exercise more control over the process? In the pre-zone-system days, photographers would “expose for the shadows.” One would meter what is intended to be a dark, textured object, such as black fabric. The meter, as usual, indicates an exposure that assumes that the subject is middle gray. Reducing the exposure by two stops will usually render the dark object as an acceptable dark value in the final image. This method works well with negatives, since with this medium, it is usually more important to prevent underexposure than overexposure. For digital imaging, where the reverse is true, it may make more sense to “expose to the right”; one meters something that is intended to be a light textured object, such as white cloth or a light stucco wall, and then increases the meter’s indicated exposure by two stops to raise it to an acceptable image value. Either of these methods can be successful, especially if one has tested one’s camera and subsequent processing, and made adjustments if necessary.
 |
 |
|
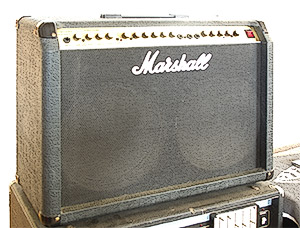
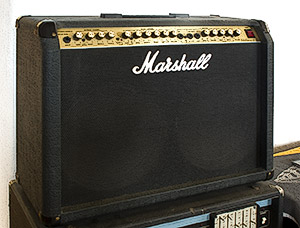
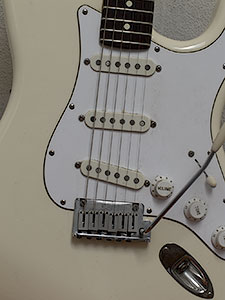
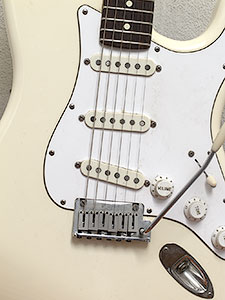
| Exposed according to the spot meter reading. Dark fabric is rendered middle gray. | Same, with exposure compensation of -2 dialed in. Images processed identically. | |
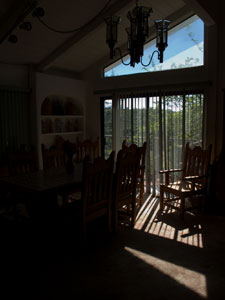
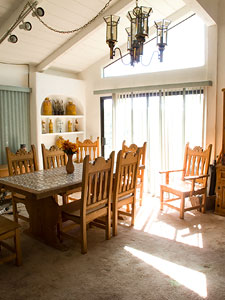
 |
 |
|
| Meter again indicates an exposure that results in middle gray. | Same, this time using exposure compensation of +2. | |
| Compare the second members of each of these pairs of images. You know that they are not the same color, but the light meter can’t tell the difference. | ||
Ansel Adams wanted to be able to exercise even more control over his medium, to “push it to the limits.” And, he wanted to be able to teach his method to others. So he came up with the idea of assigning subject luminances to exposure zones, and the zone system was born.1 When using the zone system, the exposure values that are recorded in the image are called zones. Since black-and-white negative film typically records a range of about 10 zones, Ansel designated the exposure indicated by a light meter, corresponding to middle gray, as zone V. If one meters a subject and then increases the exposure by one stop, we call this placing the subject on zone VI. Increasing the exposure of the white Stratocaster above by two stops places it on zone VII. Similarly, reducing the exposure of the black fabric cover of the Marshall by two stops places it on zone III.
So far, so good; the zone system sounds like an advanced exposure compensation technique. But what if one wants to know how far the useful exposure range of one’s camera or film really extends? What if one wants finer control over the midtones? What if the pictures are not turning out the way they were visualized? To fully master the zone system, the entire system from start to finish must be tested, and adjusted if necessary. Ansel tested film-and-developer combinations, and adjusted the effective film speed and the duration of negative development, so that the scale of the negative matched that of the printing paper he used, and in this way he got the results he wanted. Some have asserted that the zone system is only applicable to black-and-white negatives because they believe that it requires this specific adjustment of negative development. But this belief mistakes the means for the end; as Ansel points out, one works with one’s medium and exercises what controls are available.2
Next: the final approach