An Introduction to Photo Editing with PhotoLine: RGB Curves
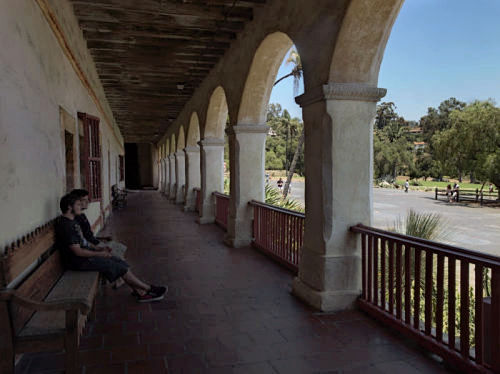
So far, we have been focusing on luminance; now we will start in on color. I usually start with the overall color balance, which means adjusting hue. Color Balance, Color Temperature, and a few other adjustments are available; but once again, Curves gives a finer degree of control. The image that we have been working on has a slight bluish cast to the foreground, and it looks like it could be warmed up overall. But note that the arches, ceiling, and upper part of the back wall already have a yellowish cast to them, and global hue changes may not help their appearance.
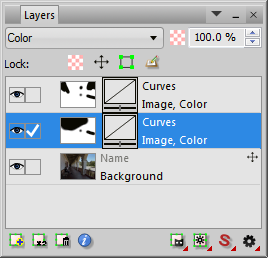
Create a curves adjustment layer, but this time leave the color mode as RGB. Then close the Curves dialog and change the blend mode from Normal to Color in the Layers panel. Reopen the Curves dialog and play with the individual color curves. Reducing red is the equivalent of adding cyan; reducing green is like adding magenta; and reducing blue is like adding yellow. And since we are in Color blend mode, we do not have to worry about changing the luminance by making these adjustments.
Reducing blue will remove a blue cast; but to my eye, the yellow that results from reducing RGB blue is a bilious greenish-yellow. (And pure blue looks almost purplish, not anything like sky blue which is between blue and cyan.) So warming up an image usually means reducing blue and adding a little red.
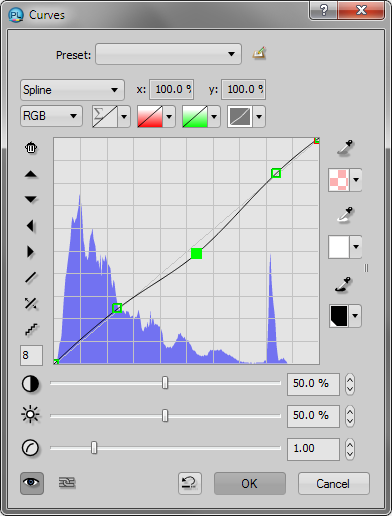
Let’s start with the blue channel. Click the light face of the foreground pillar, where the blue tint stands out, to add a point. Now very gradually lower the blue curve. Points on the curve may be nudged with the up and down keyboard arrows; this is useful for subtle hue adjustments. The eye adapts to color changes, and it can be hard to know when to stop; looking away for a minute then looking back at the image can help. When the pillar looks right, a number of other areas do not, so we will work on the curve some more. The sky, in particular, does not need any blue taken out of it; so click the sky and move its point back up to where it started, with x = y (you can type numbers into the coordinate position fields; you can also right-click them and change the units from Percent to Byte). I actually nudged the point up one more notch. Clicking the floor tiles adds another point lower down, which may also be raised back a little. My blue curve ended up looking like this:
|
The arches, ceiling, and upper wall were not improved by this adjustment, so I masked them, and the exterior pavement.
Now let’s add a little red. Select the red channel and click the foreground pillar again. My red curve was boring, raised just a little at one point. I masked the sky, the upper back wall, and the exterior pavement.
Roll your mouse over the image below to see the before and after. Once again, your eye may need to adapt after making the change.
|
 |
Color Balance (Layer – New Adjustment Layer – Color Balance) is a parametric version of RGB curves, as if you had three predetermined regions on each curve (shadows, midtones, and highlights) to adjust. Color Temperature will be discussed later as part of raw conversion.
Next: Hue/Saturation layers

