An Introduction to Photo Editing with PhotoLine: Layer Masks
Now we are going to create a layer mask for a curves layer.
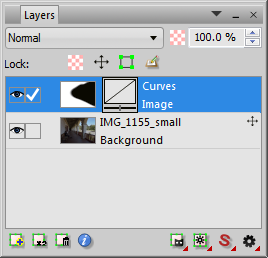
Create a curves adjustment layer as described on the previous page and make some fairly drastic adjustments. Notice that the layer has a blank white square beside the curves icon; this is the layer mask thumbnail. It starts out white because white indicates mask transparency. Click the mask thumbnail to be sure that it is selected. (I say this because it is easy to forget which layer is selected, and to start manipulating the wrong layer; you will do this sooner or later, trust me. This also applies to things like selecting colors.) Now choose the Painting tool, and set the intensity to 100%. Set the foreground color to black (click the little black and white squares). Now paint over an area in the image. The painted area will revert to the appearance of the original image, because you have masked the adjustment layer. Toggle the layer visibility (the eye icon) and you will see that the masked area does not change.
You can see a tiny version of the mask on the thumbnail. To get a better view of the mask, click the thumbnail while holding down the Alt key (Option key); then click again to undo it. You can paint on the mask in this mode to fill in spots that you may have missed. You can even do things like blur, lighten, or darken it. To turn the mask off and on to see what it does, click the thumbnail while holding down the Shift key. (You may also right-click the thumbnail and select Use Adjustment Mask, or Show Mask.) Roll your mouse over the image below to undo the effect of the mask:
|
|
|
We are using a soft brush so that the edges of the mask blend smoothly with the rest of the image. For even more gradual effects, reduce the Painting tool intensity and use multiple strokes. Setting it to something like 10% allows for very fine, gradual adjustments. If you just want to reduce the adjustment by half, say, in a certain area, set the intensity to 50% and paint the area. Very large brushes allow for smooth transitions and gradients; small brushes produce more detailed masks. To harden the brush, increase the inner radius.
If you want to remove the mask in a certain area, or refine something that you painted, exchange the colors by clicking the right-angled arrows beside the color fields, or by typing “X.” Now paint with white on a black area of the mask, and the mask is attenuated or removed.
You may want to apply an adjustment to just a small area of the image. In this case, it may make more sense to mask the entire adjustment, then paint with white where you want it to show. To do this, set the foreground color to black, then double-click the Painting tool to fill the entire mask with black. Now exchange the colors, and paint with white on the mask. The effect of the adjustment will become visible only in the areas that you paint.
This is the heart and soul of image editing. It is the digital analog of old-fashioned darkroom dodging and burning, but you can dodge and burn with ANYTHING, including contrast, color adjustments, even totally different images.
For future reference, there are more advanced ways of creating masks, such as by using a channel, or the various lasso tools.
Putting it together
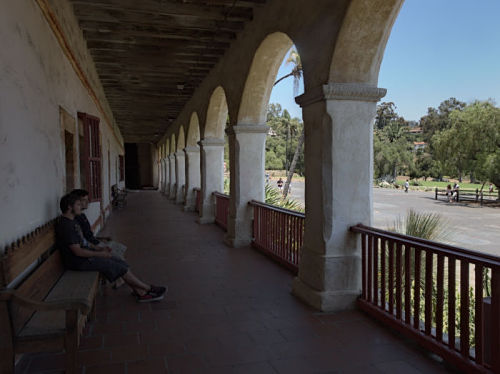
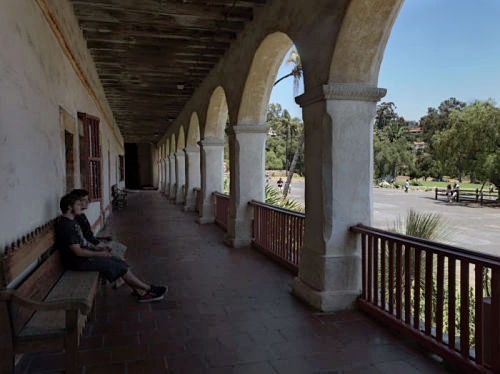
Revert to the original image (delete the curves adjustment layer by right-clicking it – Delete Layer). Create a new curves layer as you did before and select the L channel. Now we are going to make a targeted adjustment. Click the dark tile on the floor beside Zeke’s foot to place a point on the curve. Now click one of the lightest areas in the tiled floor to place a second point. Gradually raise the second point to lighten the image and add contrast to the shadows. Focus on the areas of interest as you do this; don’t worry about what it is doing to the rest of the image. Then mask the exterior and the pillars as in the image above. Examine the entire image to see if the relationships look correct; if necessary, go back and adjust the curve some more. Toggle the layer visibility and the mask to keep track of what you are doing. Adjust the layer opacity if needed to increase or decrease the overall effect.
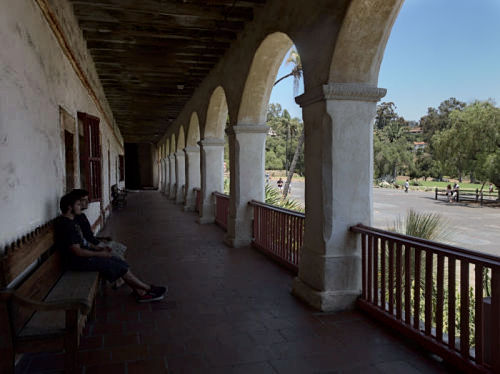
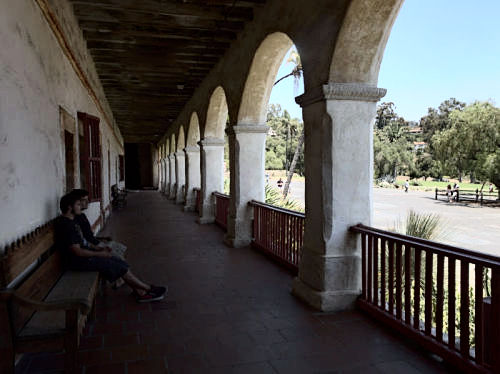
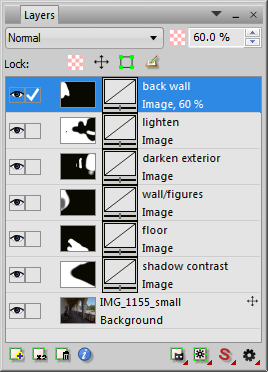
The image below has six such layers. Roll your mouse over it to see the before and after. From bottom to top:
1. Lightens and adds shadow contrast (as described above)
2. Adds more local contrast (“snap”) to the tiled floor
3. Lightens the back wall and the figures
4. Darkens and adds contrast to the exterior
5. Lightens the entire interior and the exterior pavement
6. Adds local contrast to the back wall
|
 |
Next: RGB curves