An Introduction to Photo Editing with PhotoLine: Advanced Selections and Masks
Selecting, copying, pasting
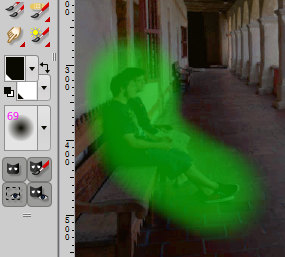
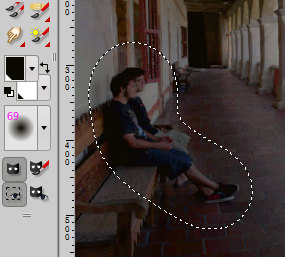
One way to make a custom selection is to use the various lasso tools. Another way, which I usually prefer, is to use the Painting tool and a mask. Click the Edit Mask icon (one of the masked icons at the bottom of the toolbox, the one with a brush) and then select the Painting tool. Paint with black on the image to mask it. Partial selections may be made by reducing the tool intensity, or by painting with a gray color; using the latter, at 100% intensity, keeps the brush strokes from being additive. You may blur or even use adjustments like Curves on the selection (Filter – Blur – Gaussian Blur, or Tool – Curves). When finished, click the Edit Mask icon again to deselect it. The entire image will be selected, minus the area that you painted/masked. If your goal is to select the area that you painted, use Tool – Mask – Invert Mask. (Note that partial selections may not generate dotted selection margins.) If you would prefer to paint with white on a fully-masked image, fill the entire image with black after clicking the Edit Mask icon, and then what you paint will be the selection.
A similar but quicker way to make a selection may be by using the Mask Brush (under the Automask tool); but it is limited to painting with white on black.
You may use Edit Mask after making a selection with the lasso tools as well, and modify it by painting or blurring as above. More tools include Tool – Mask – Expand Mask and Contract Mask.
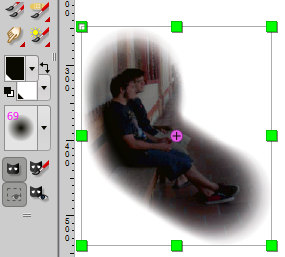
Copy the selection via Edit – Copy. You may need to flatten the image first. Edit – Merged Copy is intended to copy all layers, but unfortunately this makes the selection border hard. To paste the selection into a new image, either use Edit – Paste as Document (creates a new document), or Edit – Paste as Layer (to paste it into an existing document).
|
|
|
Color filters
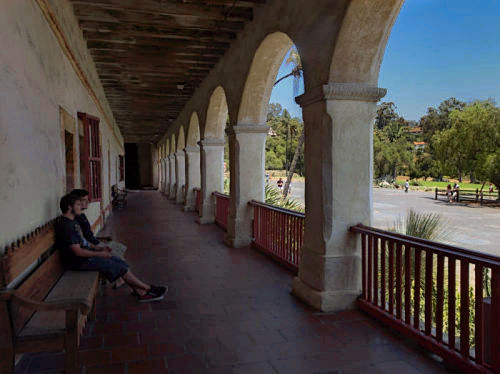
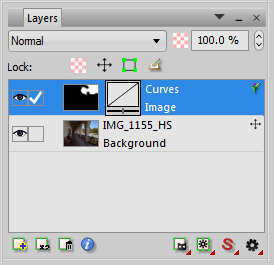
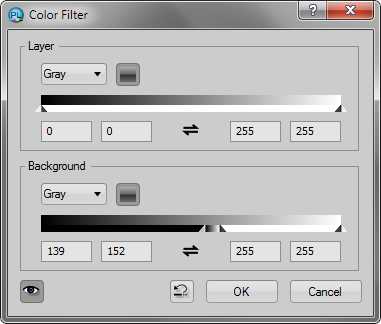
A slightly higher-tech way of making a selection is to use a color filter as we did with saturation curves. This method works when there is a luminosity or color difference between the selection and its surroundings. A classic example would be darkening a bright window on a dark wall. Below, an L curve was applied to the image, and then a Color Filter was applied in Gray mode to (mostly) limit the adjustment to the sky (right-click the curves layer and select Color Filter). As the adjustment also affected other areas such as the pavement, the layer was masked to exclude those areas. Roll your mouse over the image to compare the result with the original.
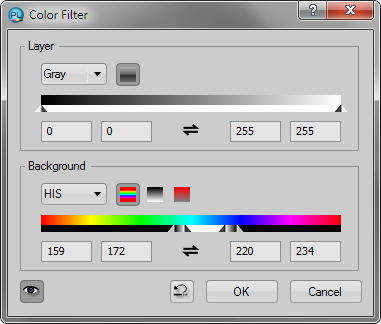
For this particular image, a similar (probably better) result may be obtained by using the Hue channel of the color filter in HIS mode.
|
 |
 |
 |
Channel selections
Using a channel as a mask is a more advanced way to make custom selections, sometimes very complex ones that cannot be made any other way. This method also relies on a color difference between the selection and its surroundings. View the channels on the Channels panel. To view the individual channels one at a time, Alt-click (Option-click) the eye icons. If you would like to save a channel as an image, click the Channel to Layer button at the bottom of the panel and a new layer will be created that consists of the selected channel.
 |
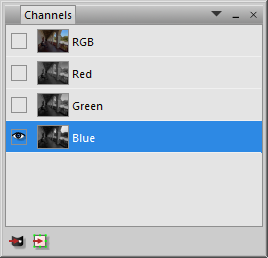 |
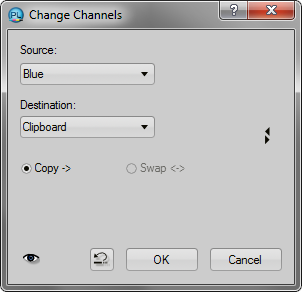
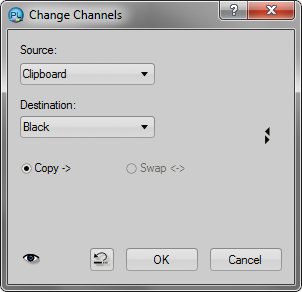
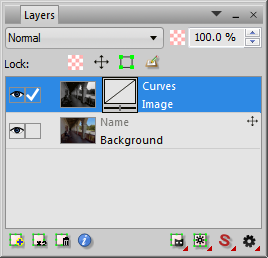
Let’s say we wanted to adjust just the sky in our image. Viewing the channels lets us determine that Blue has the greatest separation between the sky and its surroundings. (It doesn’t matter which is lighter as the mask can be inverted.) Having determined this, click the RGB eye icon and return to the composite image. Now use Tool – Change Channels to copy the Blue channel to the clipboard. Source is Blue (our chosen channel), Destination is Clipboard; make sure Copy -> is selected and click OK. Now create a curves adjustment layer and make sure it is selected. Reopen Tool – Change Channels to paste the Blue channel into the layer mask. This time, source is Clipboard, and Destination is Black (not Mask). Now the curves layer mask is a copy of the image’s Blue channel.
 |
 |
 |
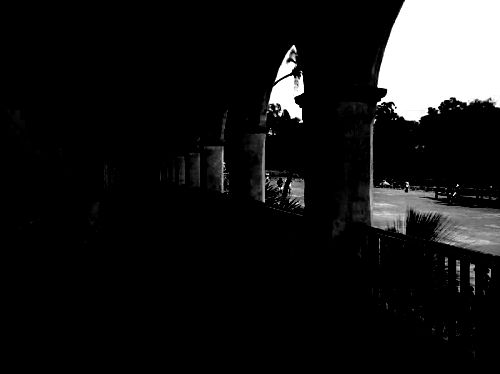
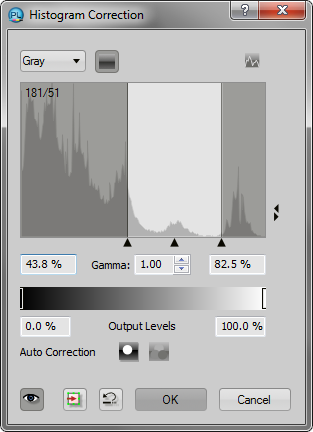
Alt-click (Option-click) the layer mask thumbnail to view the mask. Use Tool – Histogram Correction (sometimes called “Levels”) to compress the values so that the sky is completely isolated from its surroundings. Lowering the upper slider whitens the sky; raising the lower slider blackens the surroundings. What you want is the image below; there is a clear separation between the sky and its surroundings, and what is left of either can easily be finished with the Pencil tool. In this case, the gray and white areas outside the sky need to be painted black.
 |
 |
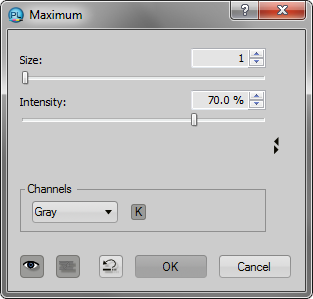
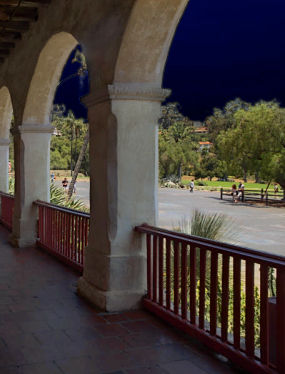
It usually helps to apply a 1-2 pixel Gaussian blur to soften the edges (Filter – Blur – Gaussian Blur). The mask may be expanded or contracted by adding a Minimum or Maximum adjustment layer as a child layer; Maximum expands the selection and contracts the mask, Minimum does the opposite. Create it via Layer – New Adjustment Layer – Maximum or Minimum, and click Group With Previous Layer beside the eye icon. (Remember to unclick it next time!) Below is an extreme example to illustrate what channel masks can do:
 |
 |
 |
In some situations, channels other than red, green, or blue may be useful. For example, to isolate a magenta flower on a yellow background, the Y channel of CMYK may work the best. The background layer determines the document’s channels, which are shown on the Channels panel. CMYK is not the best for general image editing, so we will need to create a copy of the image (Edit – Merged Copy; Edit – Paste as Document) and convert the Type to CMYK on the Layer panel, or via Layer – Convert Layer Type. Now you have access to the CMYK channels, which may be copied and pasted to the original image via Change Channels as described above.
Child adjustment layers
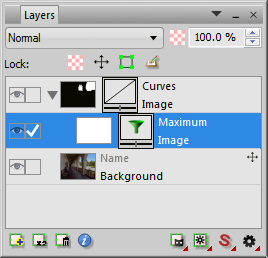
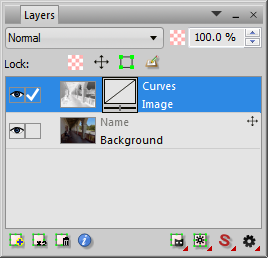
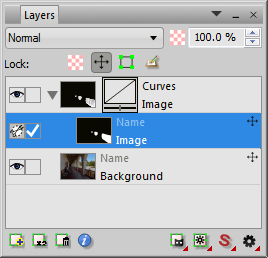
One of PhotoLine’s advanced features is that layer masks and even entire adjustment layers can be added to adjustment layers. An example was the Maximum layer above. Consider a complex mask such as one of the image channels, the inverted Green channel for example. Copy it to a curves layer using Tool – Change Channels, display it, and invert it via Tool – Color – Invert. Lower the L curve to darken the image. Now we have several options. If we want to add to the mask without painting destructively on our channel mask, we can add another mask to the curves layer via Layer – Layer Mask – Create (or by clicking the Layer Mask icon at the bottom of the Layers panel). Now we have a child mask that will add to the effect of the channel mask, so we can isolate the adjustment to the red railing, for example. No matter what we do to the child mask, our original channel mask remains intact.
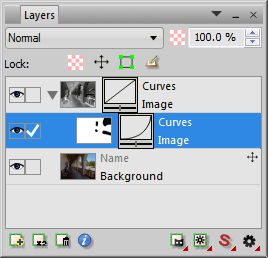
We can also add a curves layer as a child to our original curves layer, that will allow us to nondestructively modify and/or mask the original mask. Create the layer via Layer – New Adjustment Layer – Curves, and click Group With Previous Layer beside the eye icon. Now raising the curve lightens the original mask and intensifies the adjustment; lowering the curve does the opposite. The child layer has a mask of its own that masks its effect.
 |
 |
 |

