An Introduction to Photo Editing with PhotoLine: The Toolbox
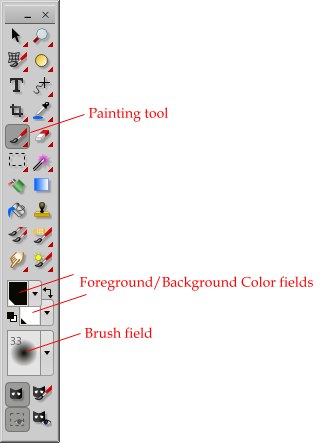
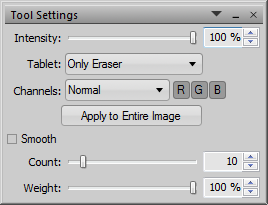
The contents of the toolbox depend on the layer type. Create an image via File – New – New Image. Below is the toolbox for image layers. We are going to start with the Painting tool as this is essential for layer masks. It is bundled with the Pencil, Chalk, and Coal tools, which can be selected by right-clicking the icon. Hover the mouse over the tool icons in the image below to see tooltips naming each tool, the other bundled tools, and keyboard shortcuts if any. The Tool Settings panel diplays the settings for the selected tool.
|
|
|
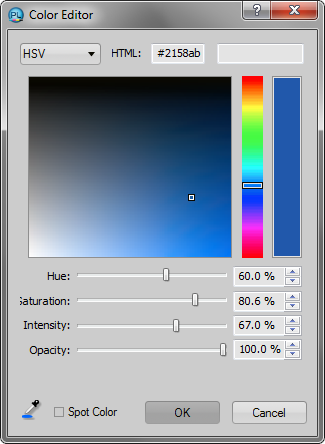
The foreground and background colors are black and white by default. To change the color, double-click the color field, then change the selection mode if necessary from Gray to RGB, HSV, or Lab, and have at it. Or, select the Color Picker tool (the eyedropper icon) and then click a spot on the image to select the color. The small black and white squares beside the color fields reset the colors to the defaults. The right-angled arrows exchange the background and foreground colors. (You can also do this by typing “X” for “X-change colors”; this comes in handy while you are painting on a layer mask.)
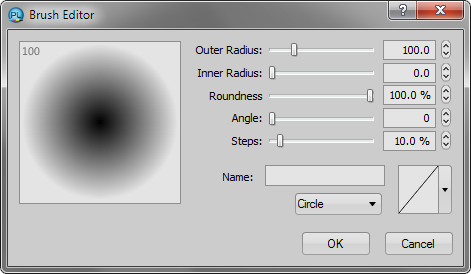
Double-click the brush field to open the Brush Editor. We are going to use a soft brush for now, so make sure Inner Radius is set to zero, and the curve field is set to the linear (first) curve. Then close the brush editor. The circle around the mouse pointer represents the brush; the number on the brush field is the size of the brush in pixels. To resize it, hold down the Ctrl key (Command key) and move the mouse. Or press the up or down arrow keys.
 |
 |
Select a color and a brush and have fun!
You can change the opacity of the paint by adjusting the Intensity on the Tool Settings panel, or Opacity in the Color Editor. Lower it to 50% for example. Note that when you paint over a previously-painted area, the paint strokes are additive. With the Painting tool, this happens only when you release the mouse then start a new paint stroke; if you want it to happen continuously, use the Airbrush tool.
Double-clicking the Painting tool (or using Apply to Entire Image on the Tool Settings panel) fills the entire image with color; this will come in handy later.
To harden the brush, double-click the brush field and increase the inner radius. The Pencil tool is the Painting tool with a completely hard edge. If you create a soft edge for a region with the Painting tool, then want to efficiently fill in the rest of the space behind it, switch to the Pencil tool. The latter is also the tool to use for painting one pixel at a time.
Next: curves
