Beyond the Digital Zone System—G11 Technical Notes
Please click here if you would like a brief introduction to the zone system. For more resources, see the bibliography and links page.
Adobe Camera Raw
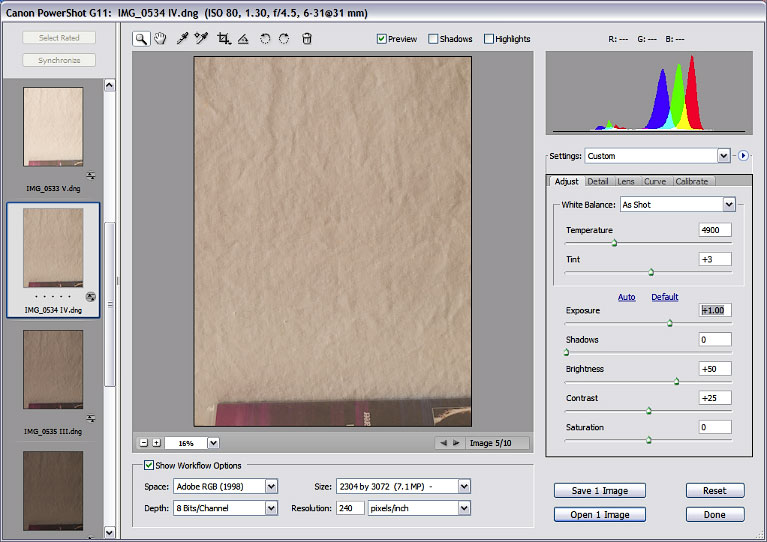
In Photoshop CS2, Adobe Camera Raw uses two settings to determine the range of RAW values that is used to create the processed image. “Exposure” actually moves the highlight end of the scale, which sets the white point. “Shadows” moves the shadow end, setting the black point. (“Brightness” moves the midpoint.) Exposure and Shadows are therefore the key variables for manipulating the tonal range of the processed image.
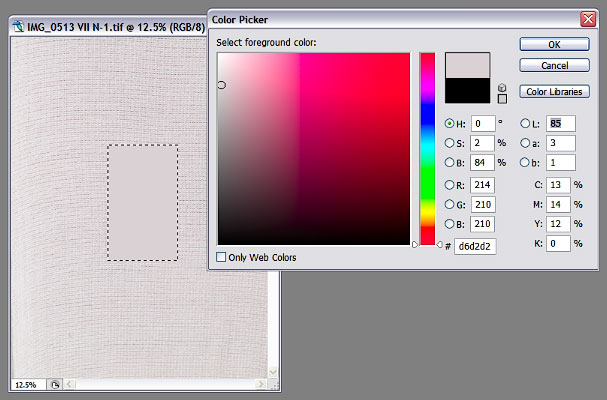
To measure the luminance of each exposure, I selected a region in the center (where the meter reads), applied the “Average” blur filter, then measured the L* component.
I made my decisions about zone placements based on changes to Exposure and Shadows (the endpoints). But as noted on the results page, the effect of increasing Brightness is almost identical to that of increasing Exposure, while preserving a little more highlight detail. When stacking multiple exposures, this may make little difference; but when only one image is involved, it may help. Below: increasing Exposure to N+2, vs. increasing Brightness to +150. Note the slight preservation of detail in the window. The shadow ends of these curves are identical.
 |
In Photoshop CS3 and above, the Adobe Camera Raw sliders are slightly different. “Exposure” and “Brightness” are the same; “Shadows” has been logically renamed “Blacks.” And two new sliders have been added: “Recovery” is like a Brightness slider that works only on the highlight end of the scale, and “Fill Light” does the same to the shadow end. These last two are extremely useful for adjusting images; but they do not change the endpoints, and so do not actually affect the extent of the tonal range of the image. Fill Light will raise the zone 0 and I values, for example, and may well improve the appearance of the image; but the point at which detail is lost at the bottom of the scale does not change.
Using the histogram
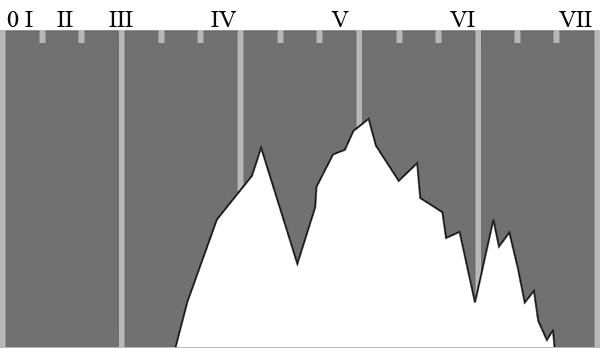
O.K., so what if I am in a hurry and do want to use the camera’s histogram to determine exposure? Aim your camera at a uniform surface and meter it; the resulting histogram shows you where zone V is. Then increase the exposure by one stop to see zone VI, and so on. Below is how mine calibrates; I have marked the sections off in imaginary thirds to show where zones IV and above fall. Zones III through 0 are progressively more compressed.
Why “beyond” the digital zone system?
O.K., maybe the title is a little presumptuous. I called it that because of the detailed attention to measurements of the response curve, and the departure from the conventional dynamic range, as Beyond the Zone System does. RAW and high dynamic range imaging are transforming the entire concept of image capture, and we are not just dealing with negatives on film anymore.