An Introduction to Photo Editing with PhotoLine: Raw Conversion
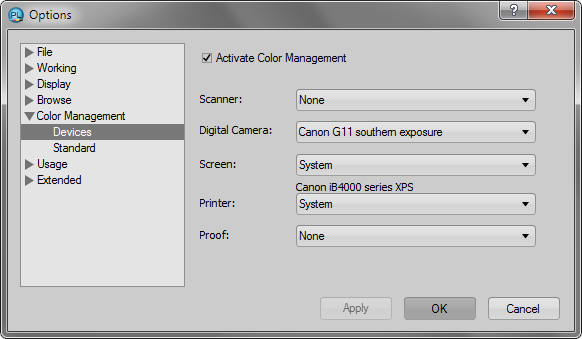
If your camera is able to save raw images, you may be able to obtain images of higher quality than you would otherwise; but it takes some doing as raw conversion is a complicated process. Potential advantages include more bit depth, gamut size, and dynamic range. I personally recommend RawTherapee, a free and open-source application, for raw conversion, partly because it is one of the few that can use .dcp camera profiles. (This is another subject; you will need an X-Rite ColorChecker, as well as ColorChecker’s own free calibration software [Support tab partly down the page – Software Downloads] and a .dng converter: Adobe - Windows | Adobe - Mac | digiKam, all free downloads. The process is actually fairly simple, and the results are amazing.) But PhotoLine is able to process raw images as well. In the absence of a .dcp profile, you should use an ICC profile specific to your camera, specified via Edit – Options – Color Management – Devices – Digital Camera. You may be able to download one; or now you can make one with a ColorChecker and version 2 of the ColorChecker calibration software. Another option is dcp2icc. See “Notes on raw conversion using .icc profiles” below for some further details.) But if you must, you can process your images without one.
Every camera uses a specific raw image format; for example, Nikon uses NEF and Canon uses CR2. If you are using the latest version of PhotoLine, it will probably recognize your camera’s raw format.
Note that some of the adjustments described below may be applied to non-raw images as well.
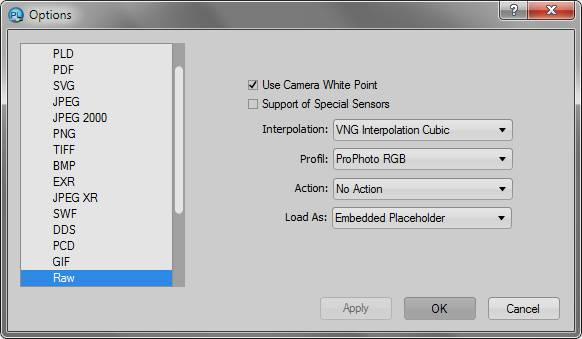
Start with the settings under Edit – Options – File – Raw. I recommend using the ProPhoto RGB profile to take full advantage of the camera’s gamut; reduce it if necessary later, such as when saving for the web. New in Version 21, raw images may be opened as placeholders (“smart objects”); if so, dynamic filters (“smart filters”) can be applied to the raw layer, and a Lens Correction layer will automatically be created as described below. The safest route is to use an embedded placeholder; a file-based placeholder will result in a smaller file, but requires the presence of the original raw file.
|
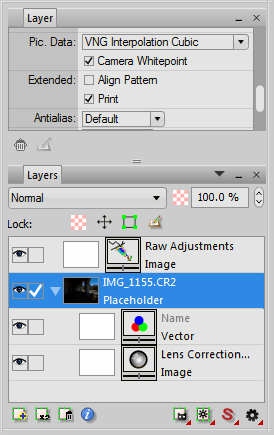
When you open a raw image, one to three layers are automatically created in addition to the placeholder or background layer. If the image is not opened as a placeholder, do not edit the background image itself, or it will be converted from raw to a conventional RGB image. (The pixel data of a placeholder cannot be edited directly.) Save a master file as a PLD, and the final converted file as a JPEG or whatever.
The Placeholder/Background layer
Sensor array interpolation/demosaicing
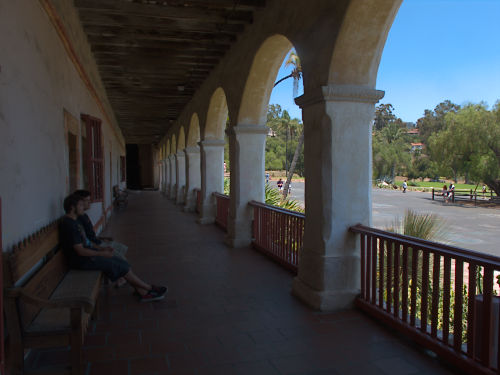
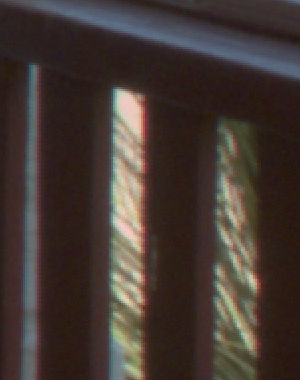
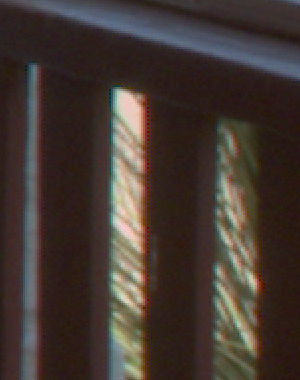
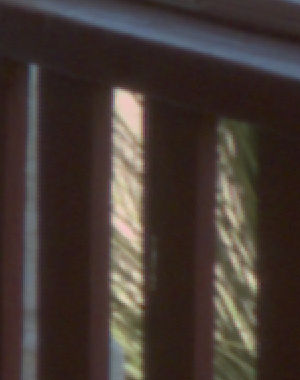
First, note that the placeholder or background’s Layer properties panel includes an entry called Pic. Data that specifies the sensor array interpolation method. Raw images are not like ordinary RGB images, and the pixel data must be put together (“rasterized”) in what may be a complex way. The default VNG Interpolation Cubic seems to work for this camera’s sensor and raw file format; note the more intense chromatic aberration using Cubic Interpolation. There is also a little bit more roughness to the fine lines with the latter.
 |
 |
 |
The Lens Correction layer
Lensfun
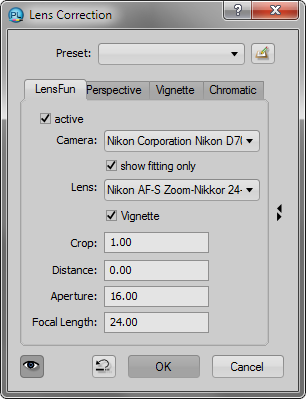
New in version 21, Lensfun is an open source library of lens correction profiles. Corrections include distortion, vignetting, and chromatic aberration; but distortion seems to be the only one that is consistently available in the actual lens profiles. If a suitable lens profile is found based on the image’s exif data, the Lens Correction layer is active by default; if not, it may be activated and a lens manually chosen. The other tabs on the Lens Correction dialog may be used whether Lensfun is used or not.
Lensfun does not find the lens for the Canon G11; I had to select it manually. Check “show fitting only” to limit the lens choices to those fitting the camera. If you need to select a camera or lens from scratch, type the first letter of its name into the Camera or Lens field to jump to that spot in the list. Lens is actually the only setting that is required; Camera is only there for convenience. If the other parameters are present in the exif data, they appear to be applied correctly as long as the values in the dialog are zero. You can get the aperture and focal length from the exif data if necessary (on the Document panel under Information). You just have to know your camera’s crop factor.
Check “active” to activate the overall Lensfun correction. Vignette activates only the vignetting part (which does not seem to be available for many lenses).
 |
 |
Undistort Lens (Filter – Digital Camera – Undistort Lens) may be used if necessary to manually correct lens distortion, which makes straight lines look bowed in or out as if on a curved surface. It and perspective correction (below) may be applied to any image via a stamped layer like sharpening (Edit – Merged Copy, Edit – Paste as Layer), or as dynamic filters to a placeholder. You may need to hide the background layer to assess the effect of these adjustments on a stamped layer. Showing the grid helps: View – Alignment Helpers – Show Grid. Adjust the grid appearance via Edit – Options – Display – Grid; adjust Grid Distance for the size of the image; maybe set Type of Grid to Line, and the color to gray. You may need to crop the resulting image.
Perspective and vignetting
Perspective corrects perspective distortion, such as when looking up at a building (vertical) or sideways at a mural (horizontal). You may have to scale the image to trim blank areas, or to keep desired parts of the image on the canvas. Uncheck the little chain icon if necessary to unlink horizontal and vertical. The Rotate slider does what it says.
Vignette lets you manually correct the vignetting that is inherent in most lenses, especially at wide angles and large apertures. (Not the vignetting caused by a too-small lens hood.) You may need this correction as it is not included in many Lensfun profiles. Note that a little edge darkening is not always a bad thing.
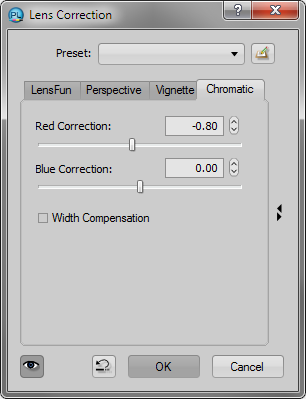
Chromatic aberration
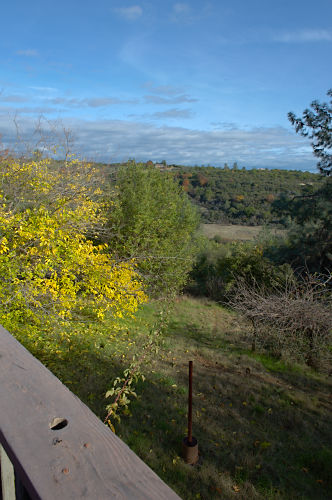
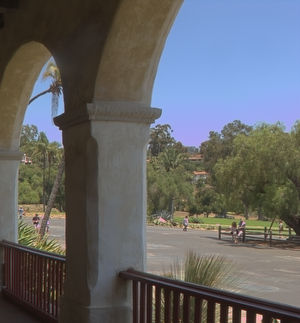
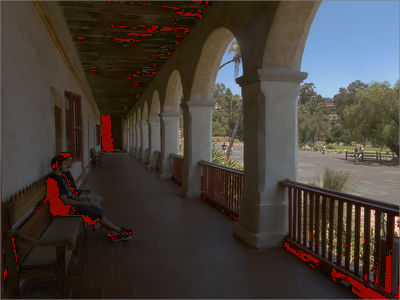
You may also need to manually correct chromatic aberration, which is caused by different wavelengths of light focusing in different planes, and is inherent in virtually all lenses. This image has red and cyan color fringes (look for them at sharp light-dark boundaries, especially near the edges of the image), indicating a need for Red Correction. Blue and yellow fringes would similarly indicate the need for Blue Correction. Width Compensation is intended to compensate for aberration scale differences farther from the center of the image. The status of the checkbox is the reverse of the caption; this image seems to do a tiny bit better with it unchecked.
|
 |
 |
The following adjustments are found in the Adjustment Layer panel; you may add it to your layout, or view it by double-clicking the layer icons in the Vector and Raw Adjustments layers.
The Vector layer
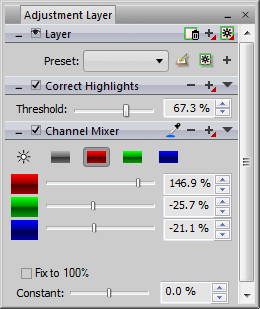
The Vector layer is created in the absence of an .icc profile to perform basic color adjustments. It is a child of the placeholder or background layer; click the arrowhead beside the image thumbnail to see it. The relevant control is Correct Highlights.
Correct Highlights (Raw white points)
The RGB sensors of digital cameras sometimes have slightly different dynamic ranges, which can cause artifact colors, usually magenta, in the highlights; if this is the case, Correct Highlights enables you to clip the white points and eliminate false colors.
 |
 |
The Raw Adjustments layer
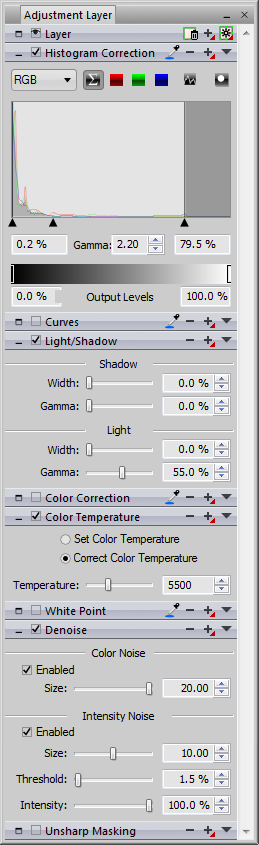
Histogram correction
The Raw Adjustments layer is a rather busy layer; we are going to hit the highlights. Histogram Correction (sometimes called “Levels”) is not my preferred tool, because you can usually do the same thing with Curves. The first and third arrows under the histogram adjust the black and white points of the image scale; sliding the origin and endpoint of a curves adjustment does the same thing. And the middle arrow is comparable to the midpoint of a curve. The only time you actually need to use Histogram Correction is if the range needs to be widened. Use View – Mark Extreme Values to see clipped highlights and shadows, and move the white and black points to get rid of them. In the image below, the shadows are clipped and the black arrow needs to be moved down, if possible. Color casts in the extremes may be dealt with by adjusting the RGB channels separately; it is hoped that you will not need to do this.
 |
Curves, Light/Shadow
Beneath Histogram Correction is Curves which we have already covered; adjust as needed. This can take the place of Color Correction and White Point as well; if there is a neutral gray in the image, click the gray eyedropper on the Curves panel, then click the gray area in the image. Next is Light/Shadow, which is a rather coarse tool, especially the Width sliders; curves will probably do a better job. For this image, increasing the Light gamma was a quick way to darken the highlights a little.
Color temperature
Color Temperature is a convenient way of warming or cooling an image. Correct Color Temperature is a logical choice here as it determines the source color temperature, which for midday sun is about 5500K. Set Color Temperature adjusts the image as if to display the indicated temperature. If you used the correct color temperature setting on the camera when you took the picture, you may not need to use this adjustment.
Noise reduction
Noise reduction is a subject all its own. Noise tends to be worse in the shadows, and small sensors produce more noise than big ones. Cameras do a lot of image processing when saving JPEGs, including noise reduction. If you are processing your own raw images then you have to deal with the noise yourself. This image did not have a lot of noise; I enhanced a shadow area to illustrate how to deal with it. It is best to view the image at 100% for noise reduction.
Since noise tends to be worse in the shadows, and since noise reduction can obscure image details in well-exposed areas, you may want to limit noise reduction to the shadows. It will then need to be on its own layer (Layer – New Adjustment Layer – Denoise). You may also want to do it more than once, first for the shadows and then differently for a clear sky, for example.
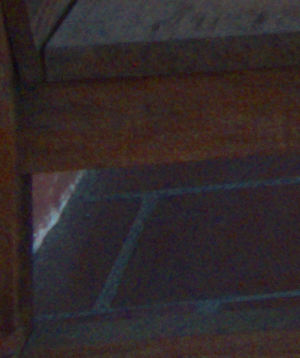
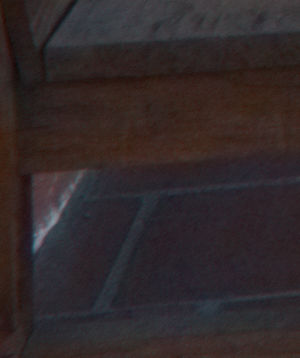
Color noise is more objectionable to the eye than luminance noise (“Intensity Noise”); a little of the latter may actually contribute to the impression of sharpness. Noise reduction is a balance between getting rid of objectionable value differences (noise) and smoothing out actual image details. In the Denoise panel, Size refers to the size of the chunks that are removed as noise. Setting the maximum value for Color Noise reduced it from the first to the second image below.
More controls are provided for dealing with Intensity Noise. Threshold determines the value difference that is considered noise; 0% does not remove anything; 100% removes a lot, and can make the image look like plastic. Appropriate values are often in the single digits. Intensity just limits the overall effect. So what you need to do is to find the magic balance between Size and Threshold. The adjustment in the third image below may be a little too much, depending on how it looks after sharpening.
 |
 |
 |
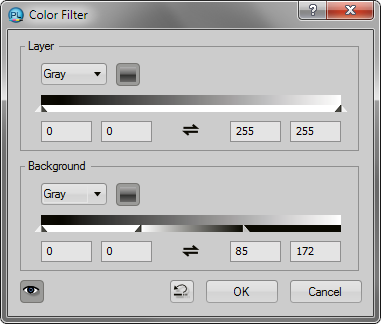
Now we are going to apply a Color Filter as we previously did with the saturation curves. This will limit the effect of the layer to the shadows. Right-click the denoise layer and select Color Filter; select Gray mode for the background. Move the upper arrow down until the noise starts to reappear in the shadows; move it up again to an appropriate level. Then raise the upper half of the split arrow. Look at a well-exposed middone with little or no noise, and move the upper half of the arrow to the point where Denoise has no effect. This will probably take some trial and error.
 |
Plugins such as Neat Image are available that give more control over the noise reduction process.
Sharpening
Appropriate sharpening is an essential part of raw processing. Again, cameras sharpen JPEGs; when processing raw images, you are on your own. Unsharp Masking is a sharpening method that we have already addressed. Deconvolution may be better for raw capture sharpening, and raw images need a greater amount than JPEGs. The Fine USM Sharpen/Deblur filter is able to perform both types of sharpening.
Notes on raw conversion using .icc profiles
If you are using an .icc profile to convert your raw images, some additional considerations apply. First, set the profile via Edit – Options – Color Management – Devices – Digital Camera.
 |
When opening a raw image in PhotoLine with an .icc profile, I find that the default image adjustments make it appear very overexposed. The middle (Gamma) slider of the Histogram Correction adjustment on the Raw Adjustments layer must be moved to 1.00 to produce the appropriate default adjustment. (Further adjustments may of course be made.)
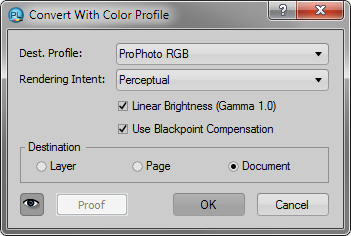
The document’s profile on the Document panel will be the specified .icc profile. For some reason, the profile cannot be changed at this point using Tool – Color – Convert With Color Profile. The profile should be changed after flattening the image, or after saving in a rasterized format such as .pld; but this time, selecting Linear Brightness (Gamma 1.0) may do better at preserving the tonal relationships. (It probably would not hurt to select Use Blackpoint Compensation as well.) If the image’s profile is not converted in this manner, it may not appear correct when saving for the web using sRGB, for example, or when printing with a printer profile.
 |
Below are examples of raw images processed without then with .icc profiles (roll your mouse over the images). The Canon image’s profile was changed using Linear Brightness; the Nikon’s was not.
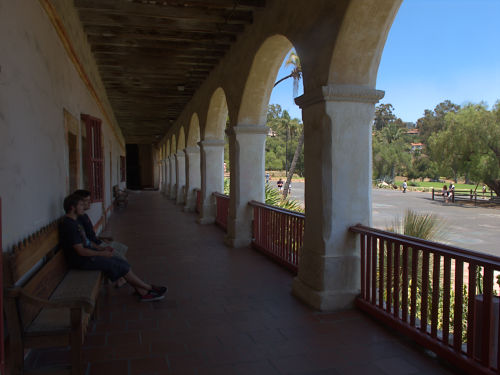
Canon G11 |

Nikon D700 |